
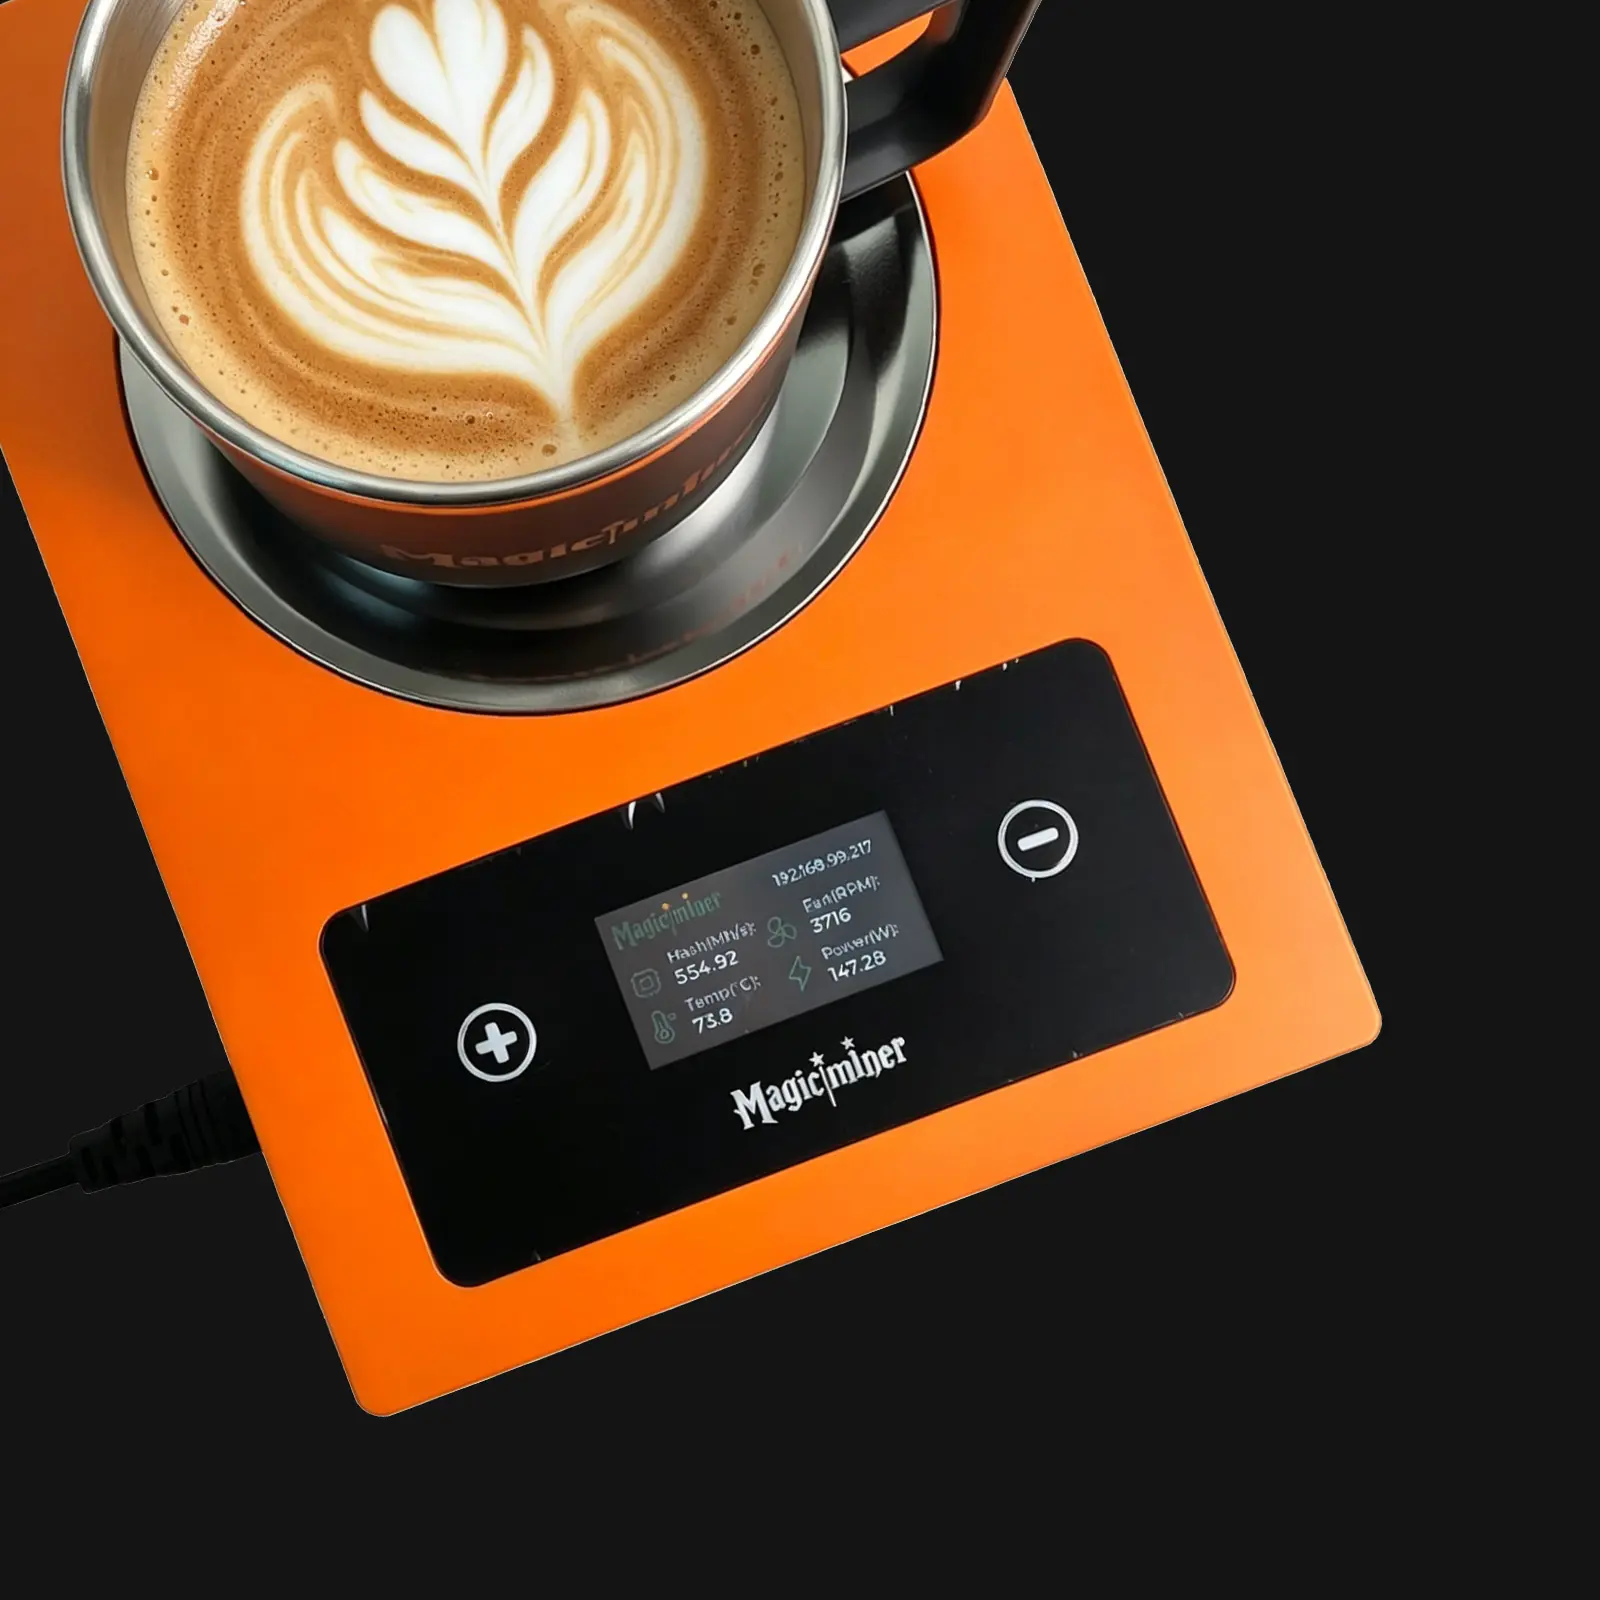
To be honest, when I first got my hands on this Magic VM02 Pro, I was a little skeptical about how to set up Magic VM02 Pro. A cup mat that can also mine crypto? Sounds like a gimmick, right?
But after using it for a week, I have to admit: it’s actually pretty impressive. If you want to set up Magic VM02 Pro the right way, keep reading – I’ll walk you through everything.
How to Set Up Magic VM02 Pro in 3 Minutes
I always thought mining equipment would take half a day to set up – flashing firmware, messing with config files, figuring out IP addresses. But when I plugged this thing in, a Wi-Fi hotspot name showed up right on the screen, something like Magic_WiFi_2026 (it might be different depending on your unit).
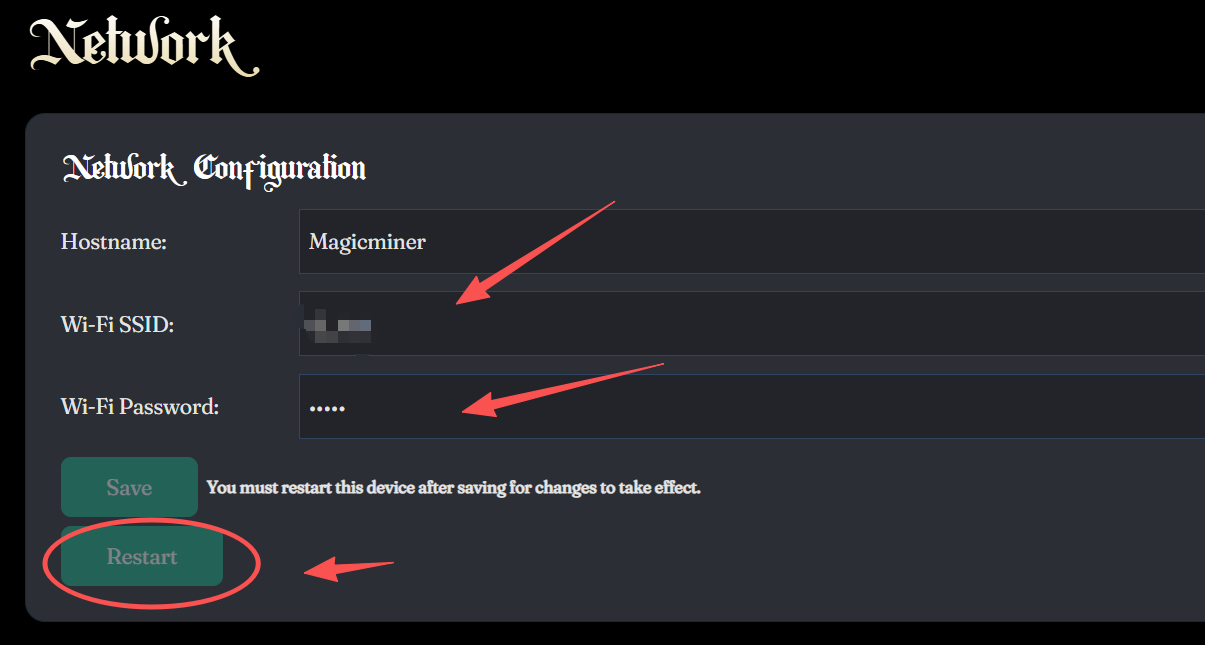
I connected my laptop to that hotspot, and the browser automatically opened the setup page. Then I just entered my home Wi-Fi name and password, clicked restart, and the device connected to the internet. Whole process took about three minutes. No command line. No tech skills needed.
Once it’s online, an IP address shows up on the screen. You type that into your browser, and you’re in the dashboard. It’s all laid out clearly – hash rate, wallet settings, network config. No need to dig through a manual.
Easy Dashboard Setup for Magic VM02 Pro
If you’re using it for the first time, here’s what you do to set up Magic VM02 Pro:
Step 1: Connect to Wi-Fi (Network)
Click “Network” on the left menu. Enter your Wi-Fi name (SSID) and password. Hit “Save” first, then “Restart”. Once it reboots, it’s connected.
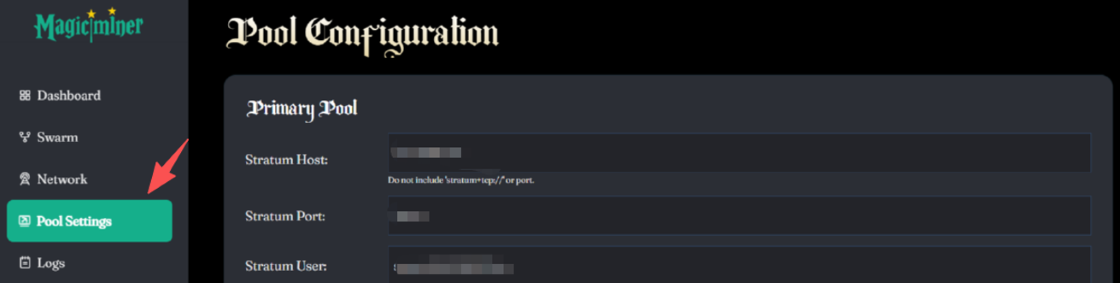
Step 2: Set Up the Mining Pool (Pool Settings)
Click “Pool Settings”. You’ll need to enter the pool address, port number, and your wallet address. Most mining pools will give you this info. After filling everything in, click “Save” and then “Restart”.
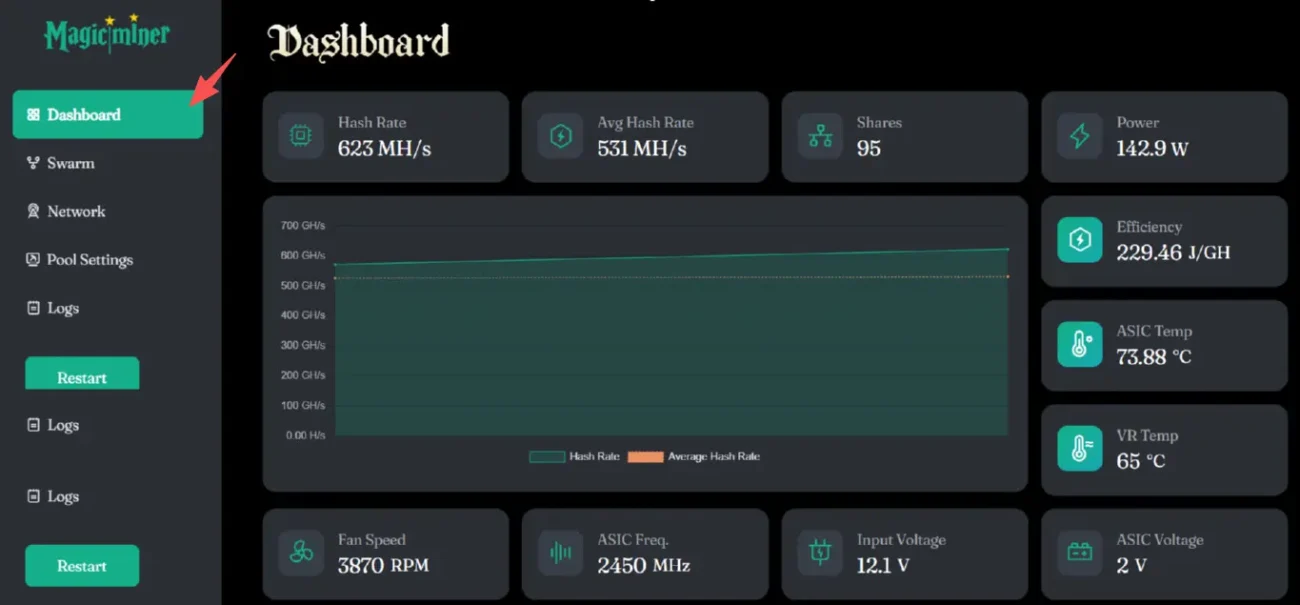
Step 3: Check Your Mining Status (Dashboard)
After it restarts, click “Dashboard”. You’ll see your hash rate, average hash rate, power consumption, and temperature. If the numbers are moving, it’s working.
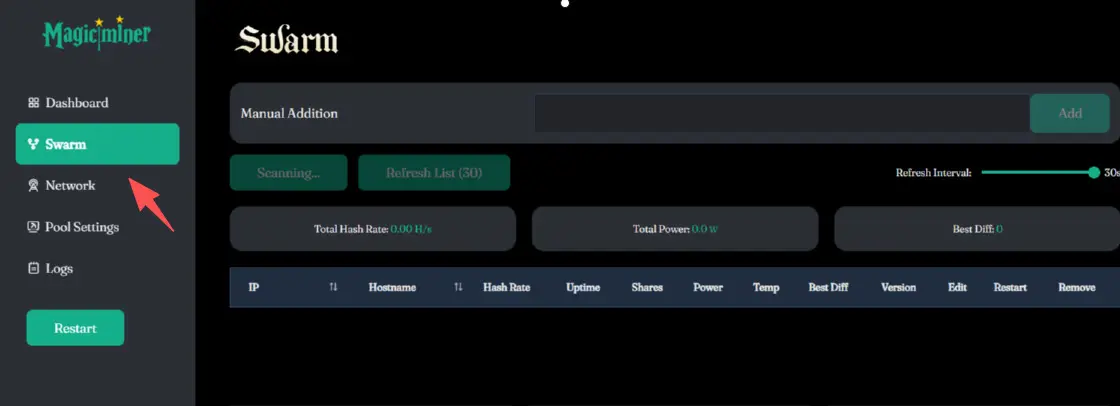
Step 4: Manage Multiple Devices (Swarm)
If you have more than one device, click “Swarm”. It will automatically scan your local network and list all your machines in one place. You can restart them all at once or change settings in bulk – super handy.
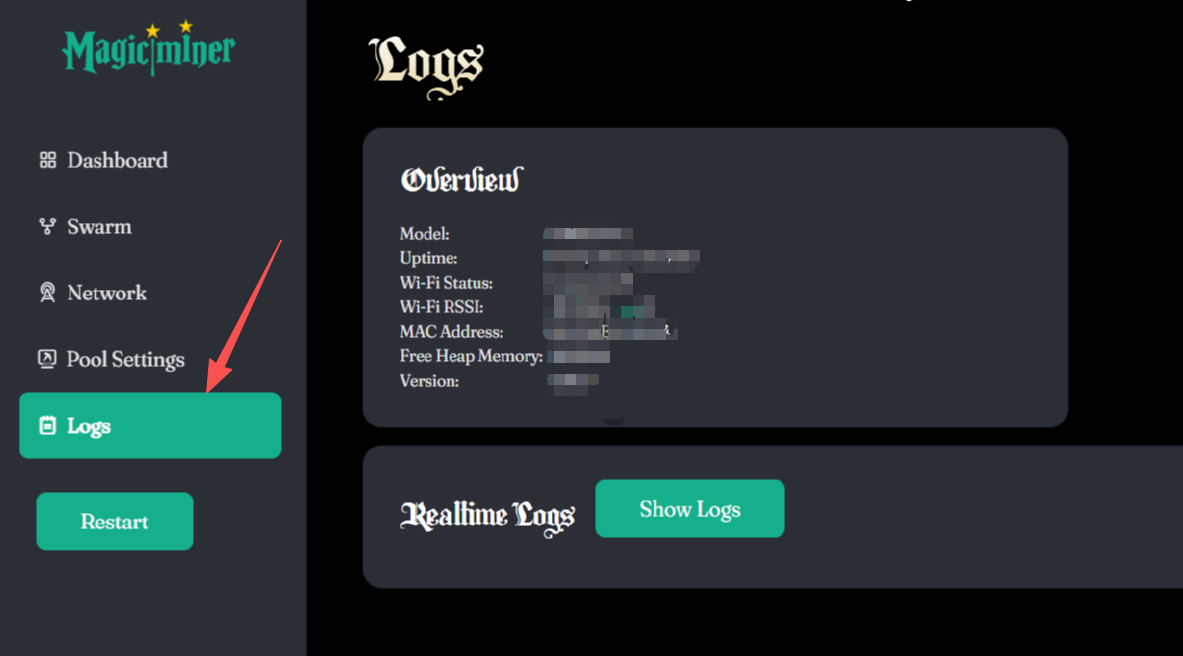
Step 5: Check Logs (Logs)
If something goes wrong, click “Logs” to see what’s happening. The dashboard shows both a system overview and real-time logs. Most of the time, you won’t need to touch this.
The whole interface is pretty intuitive. Fill in the info, save, restart. That’s it.
Another Big Surprise: It Keeps Your Drink Warm While You Set Up Magic VM02 Pro
This is what really made it feel “worth it” to me – it actually works as a constant-temperature cup warmer.
I tried putting a stainless steel cup filled with coffee on the heating area. Left it there for an afternoon, and the coffee stayed warm the whole time – not too hot, not cold. Then I tried a glass teacup, and it worked too. Not as fast as metal, but it definitely helped keep the tea warm.
So here’s the thing: you’re mining crypto and drinking warm coffee at the same time. It feels like you’re not wasting the energy – kinda cool and eco-friendly at the same time.
And It’s Quiet. Really Quiet – Even After You Set Up Magic VM02 Pro
Before this, I always thought mining rigs were loud – the kind of thing you’d keep in the living room and it’s still annoying. But this thing sits right on my desk, and I barely hear a thing. Just a very faint fan sound. You don’t notice it unless you’re listening for it.
I even left it running in my bedroom overnight, and it didn’t bother me at all. If you’re sensitive to noise, this is definitely a plus.
Final Thoughts on Setting Up Magic VM02 Pro
I’m not a tech expert, and I’m not expecting to get rich off this thing. But as a regular user, here’s what I think:
- Setup is genuinely easy – no headaches
- It’s quiet enough for a desk or bedside table
- It keeps your coffee or tea warm while mining – energy isn’t wasted
- The dashboard is simple to use. Just follow the steps and you’re good.
If you want to try mining crypto while enjoying a warm drink, I’d say this is worth checking out. For a full guide on how to set up Magic VM02 Pro, visit this detailed setup tutorial. After using it for a few days, I’m pretty happy with it.
At the same time, we also provide an operation manual. If you encounter any problems, you can easily contact our relevant technical support personnel. If you are already on the product details page, you can directly click the contact form to reach us.